Form
Form Component overview
Imagine you are working the Contacts Table. This table stores the contact information about all the employees. You want to access the contact information about an existing employee. How will you do it?
Further, a new employee has joined the organisation. You wish to create a new item in the Contacts Table. How will you achieve this?
The Forms component enables you to :
- View the data in the table at the Items Level
- Create new data Items in the Data Table
The Form component allows you to add and arrange fields. You can consider this like a specialised-Grid Layout that works with table fields.
A Form component is among the fundamental components needed for Data Table functionality.
Please refer to How to configure Singular - Item Details for a step by step instruction on configuring a Form Component for a Table.
While a Form component is present by default on the Item Details Tab, you can add one or more Forms to Layouts/ Pages as needed.
How to set up Form component in Designer
-
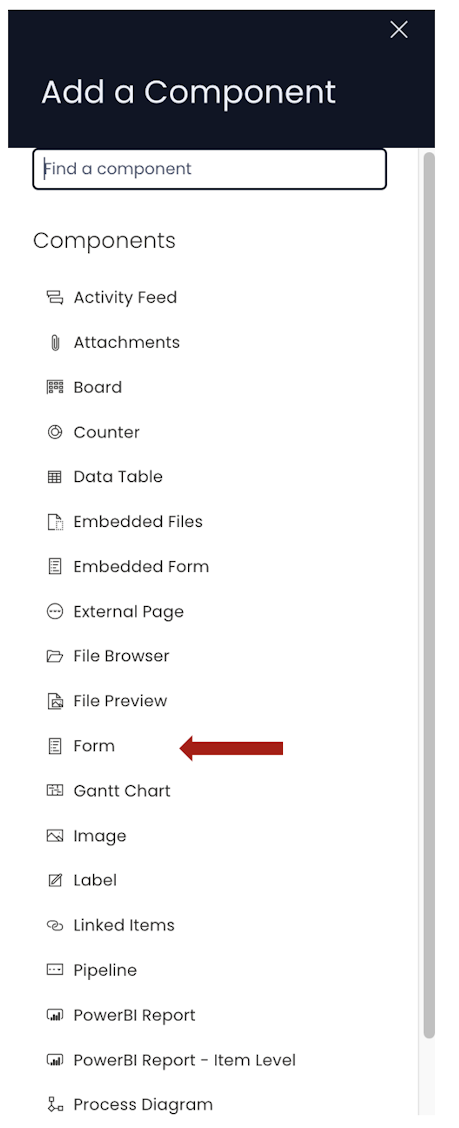
You can add the Form component on to the Layout / Page. The Form component is present on the Item Details Tab (singular) by default.
-
If the Form component is on a Grid Layout, you can resize and move the component over the layout. Also please note that within the Form component, you can resize and move the fields.
-
You can set the visibility of Form on the Details breakpoint. Also please note that setting Form invisible from Details breakpoint will hide all its fields as well.

-
Within the Form component, you can set the visibility of individual fields on the Details breakpoint.

-
You can set the visibility of Form on the Create Screen breakpoint. Also please note that setting Form invisible from Create Screen breakpoint will hide all its fields as well.

-
Within the Form component, you can set the visibility of individual fields on the Create Screen breakpoint.

-
Within the Form, you can set whether a field is mandatory (required) to be filled on Create Screen breakpoint while adding a new Item to the Data Table.

-
As you add a Form component to a Layout / Page, it will appear as shown below:
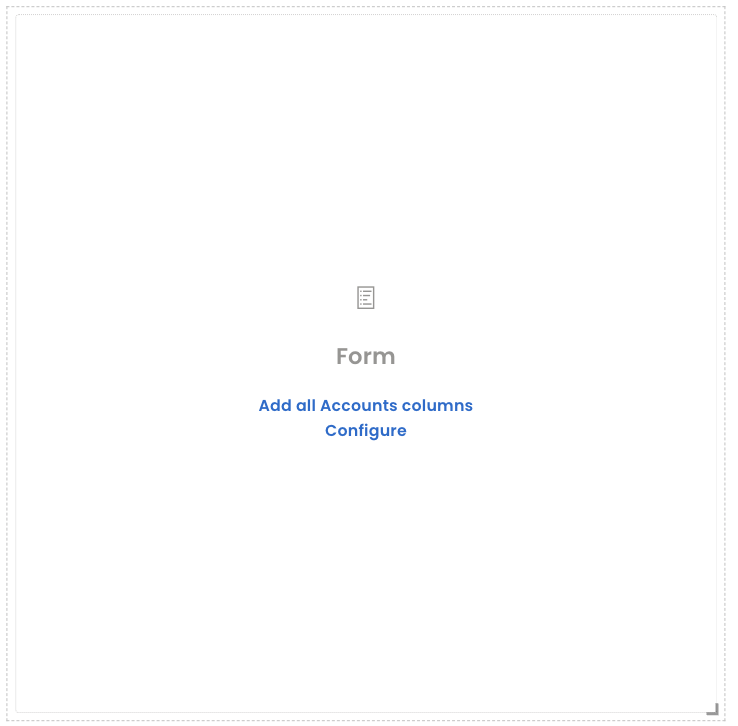
- Please note the following two options:
1. Add all <Table_name> columns - If you click on this option, the Form component will include all the existing columns to it. (Please note - the system built-in columns would not be included)
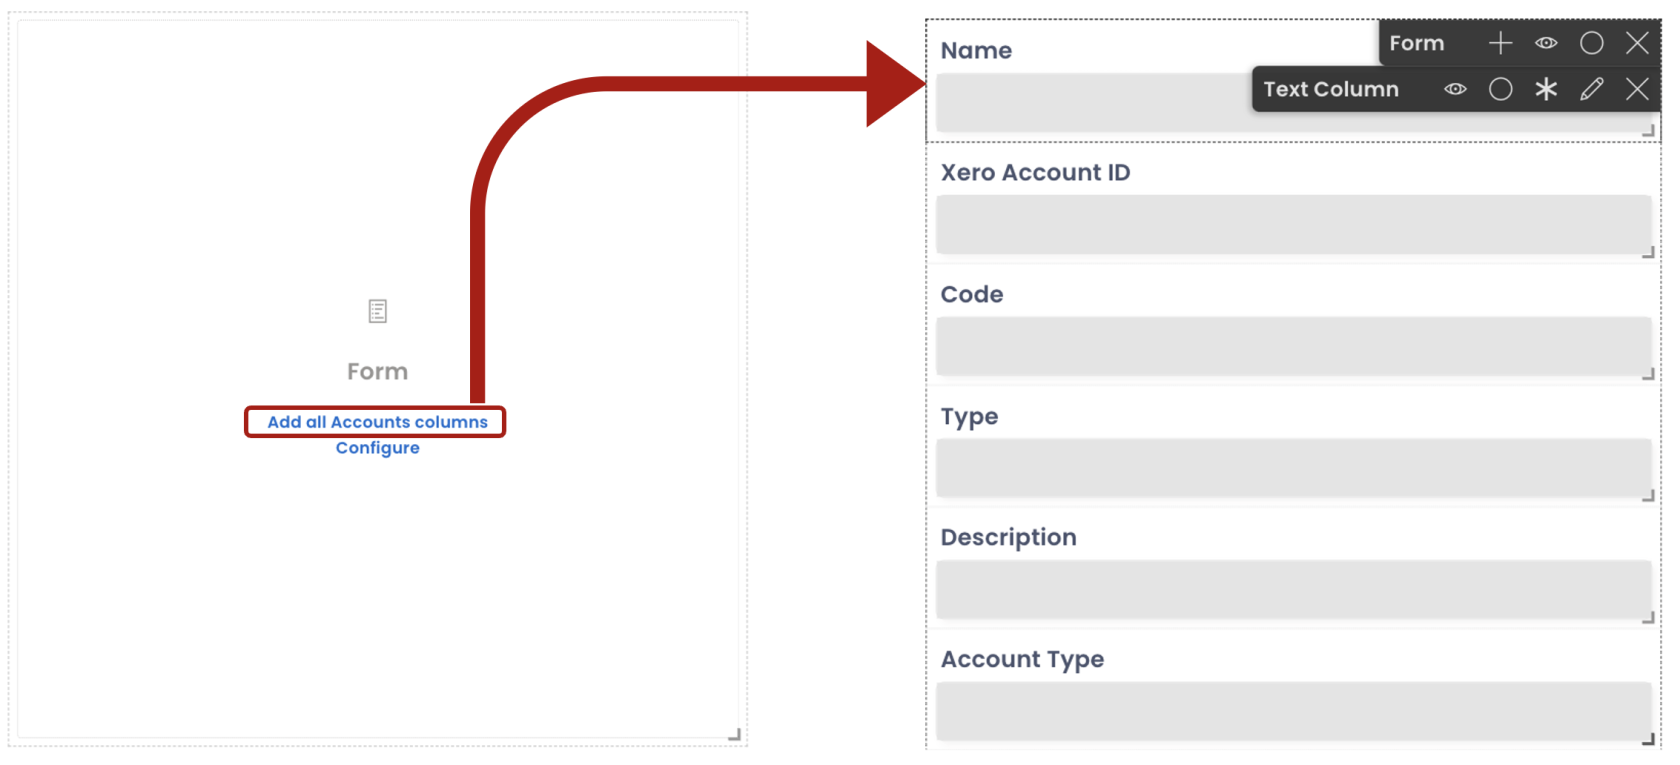
2. Configure - if you click on this option, the Form component will allow you to custom choose the columns you wish to add to the Form from the list of all columns. As you click on this option, a Form Fields panel will open.
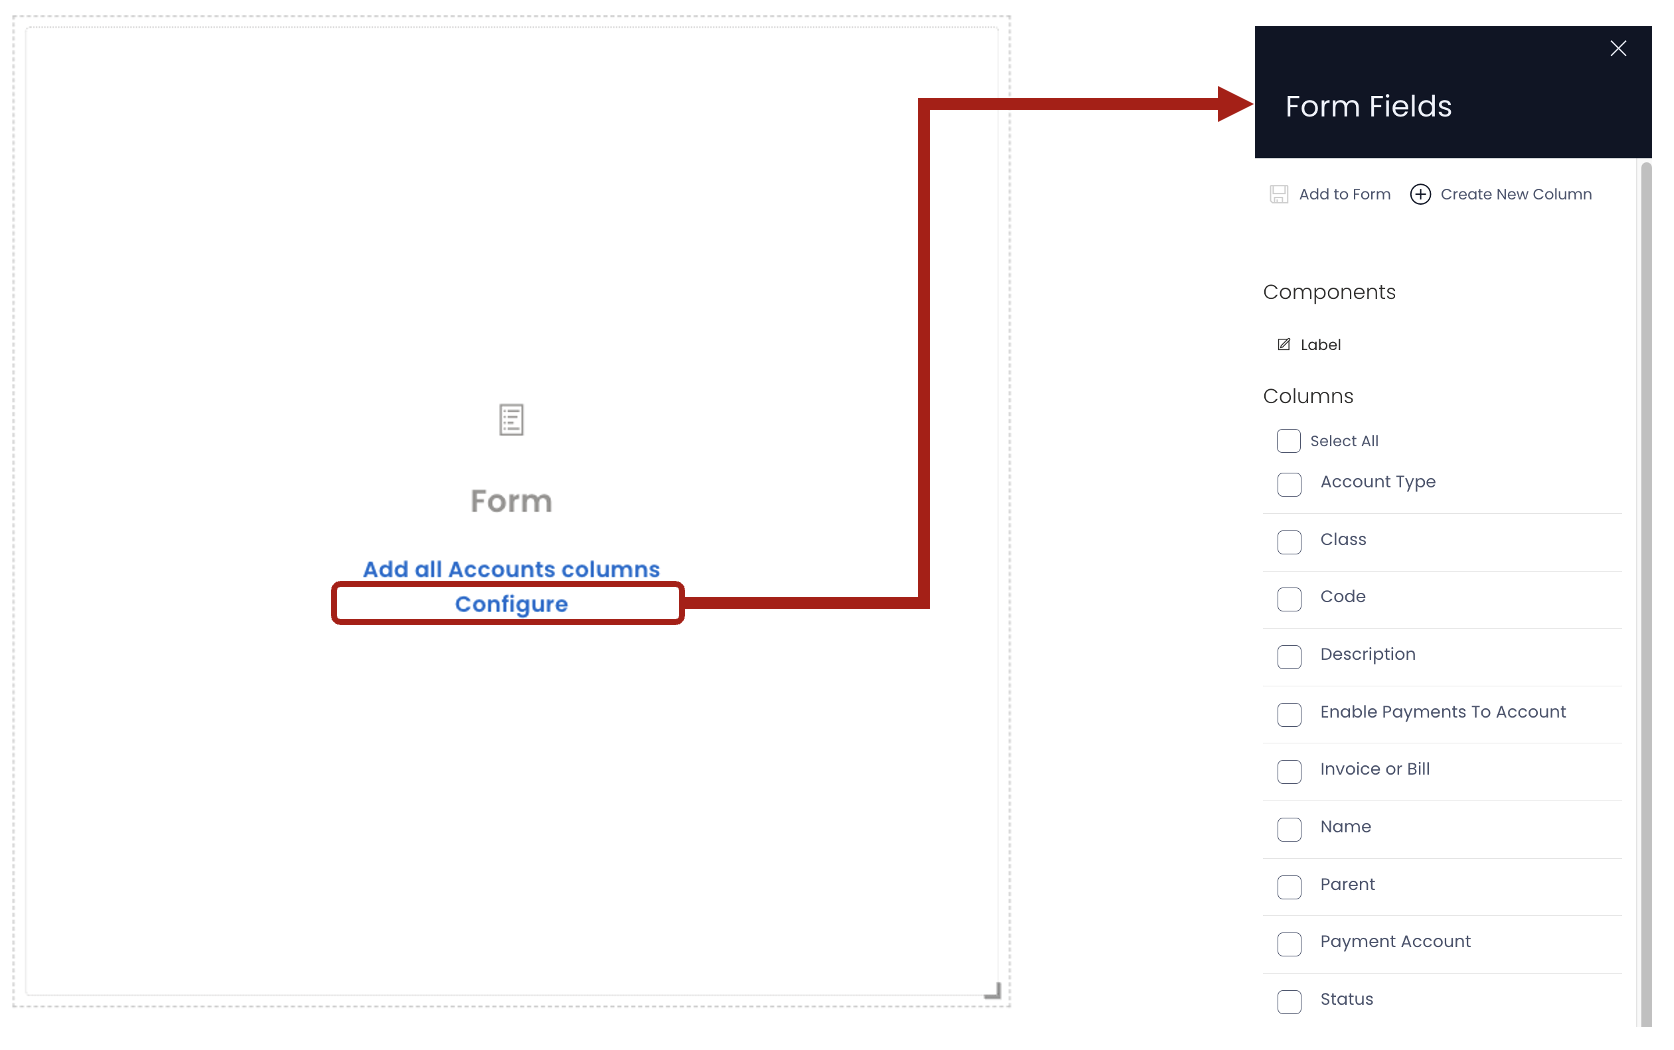
-
You can also press the "+" on the Form configuration bar. This will also open the Form Fields panel.
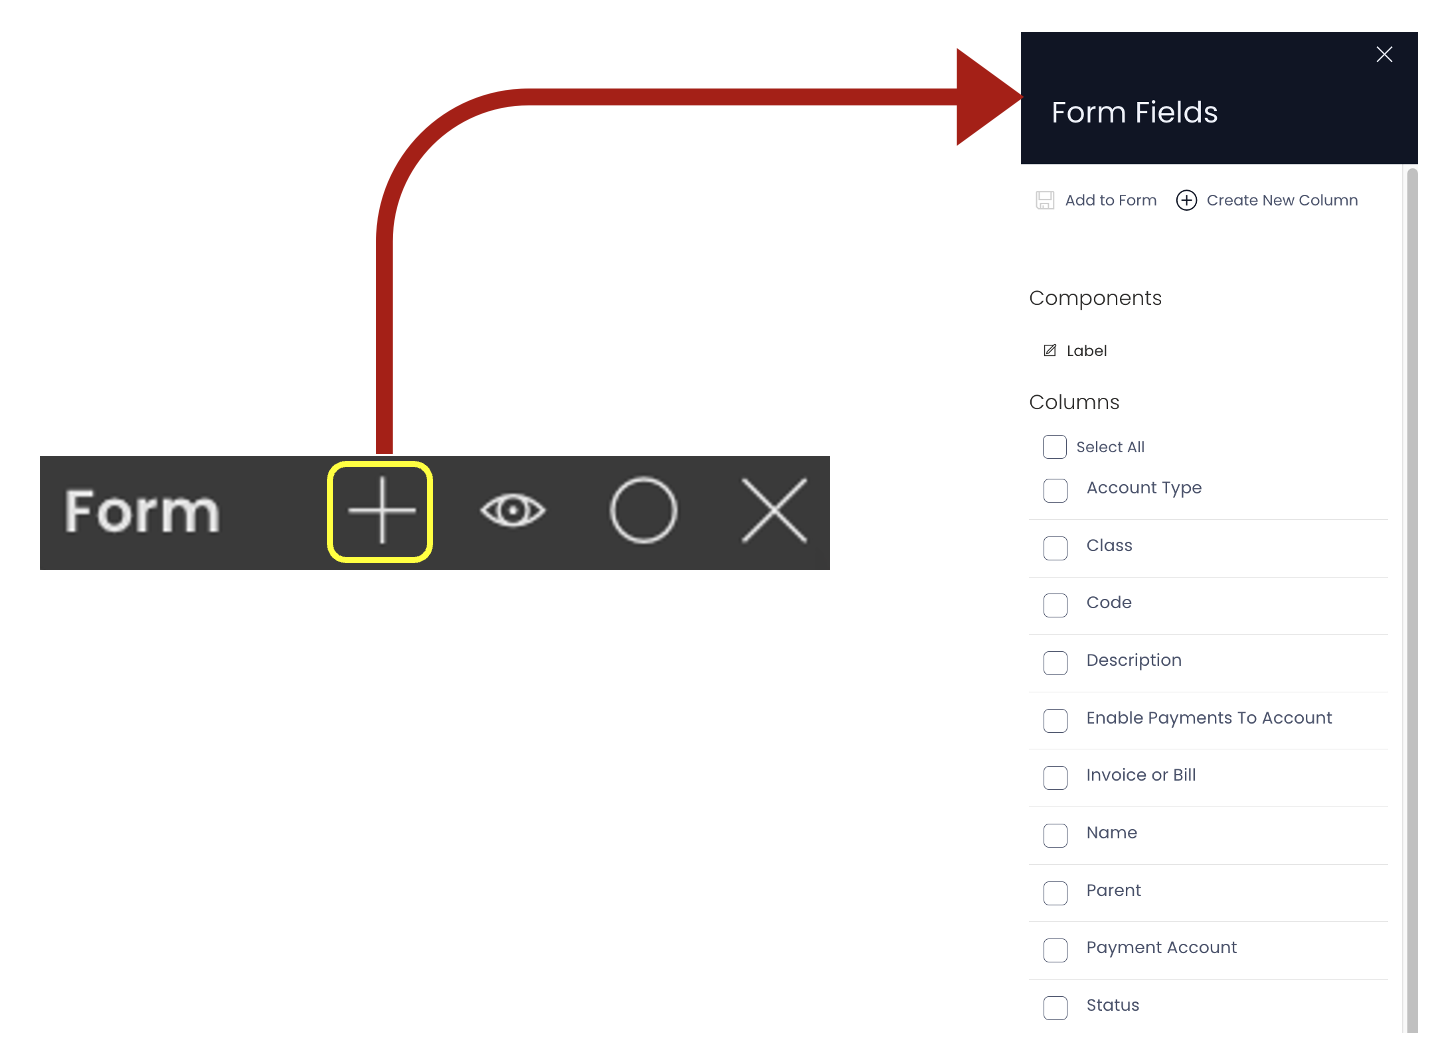
-
Within the Form Fields panel:
-
You can add a Label component with in the Form.
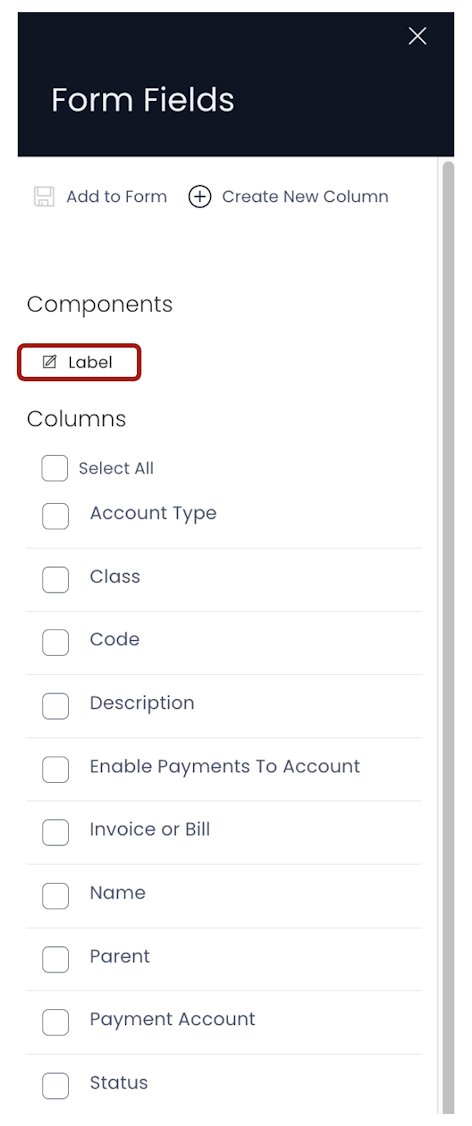
-
You can select all columns and deselect all columns in the Form Fields panel with a single click.
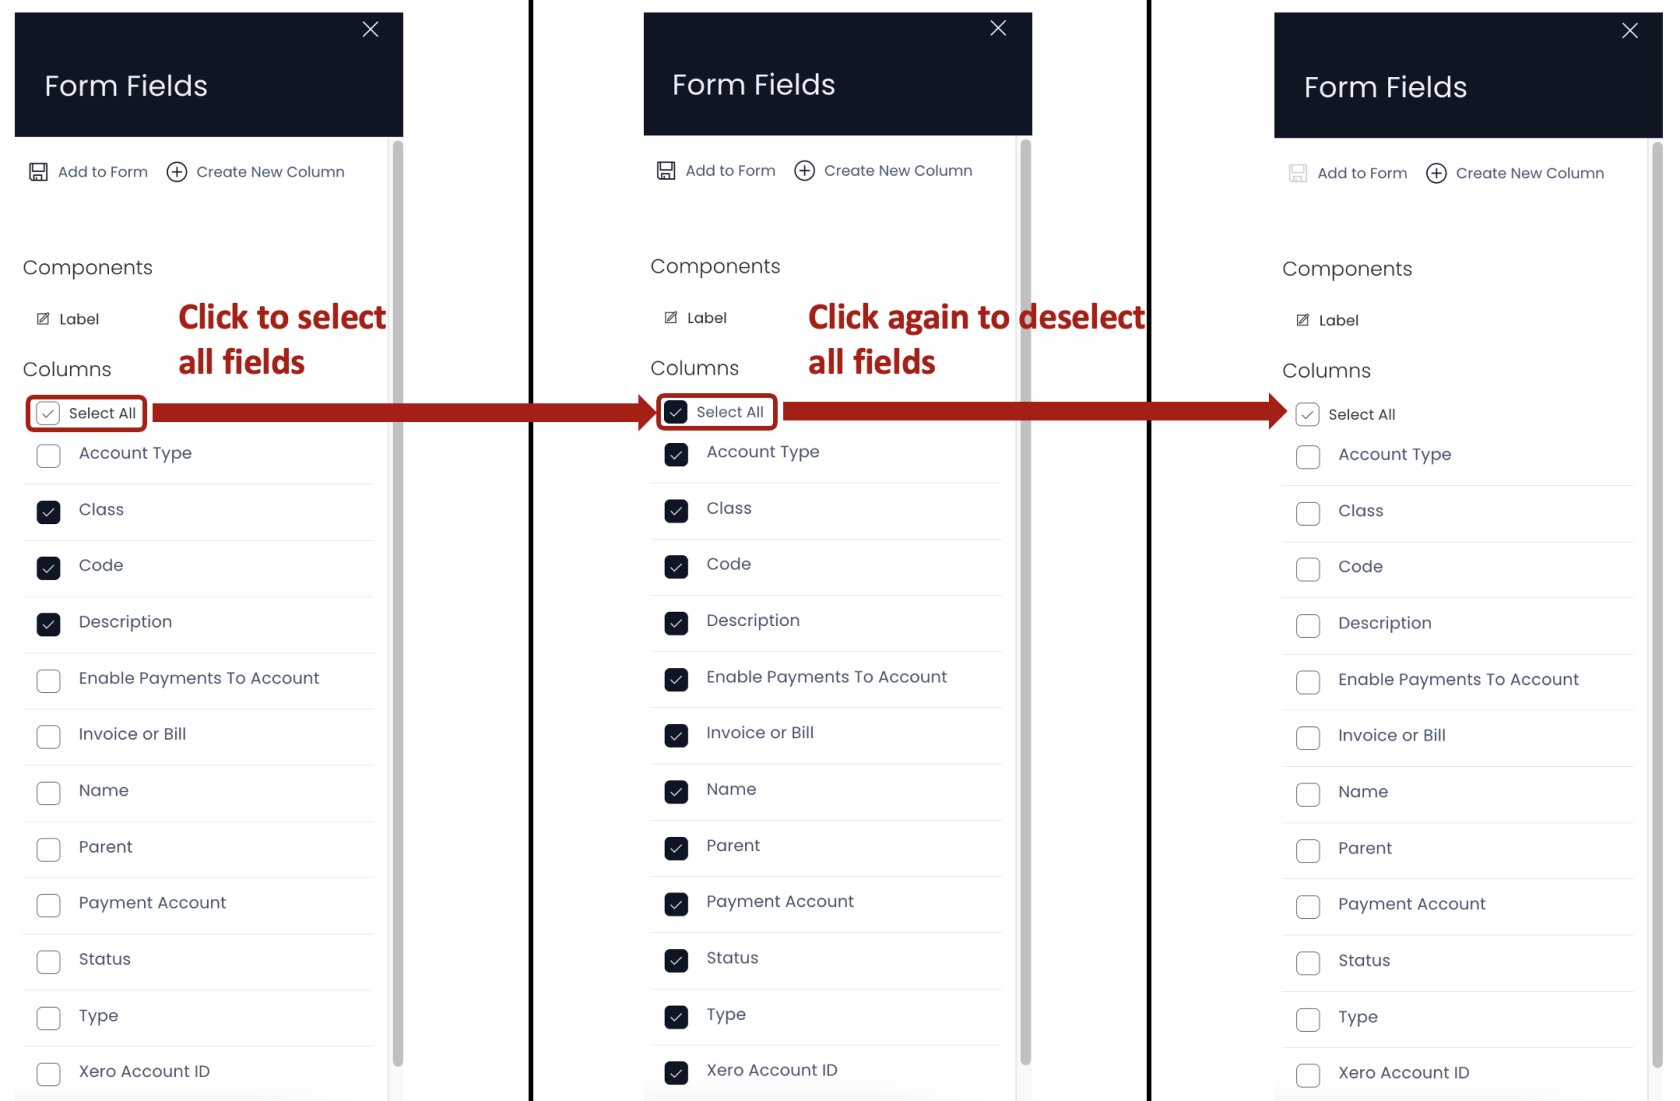
-
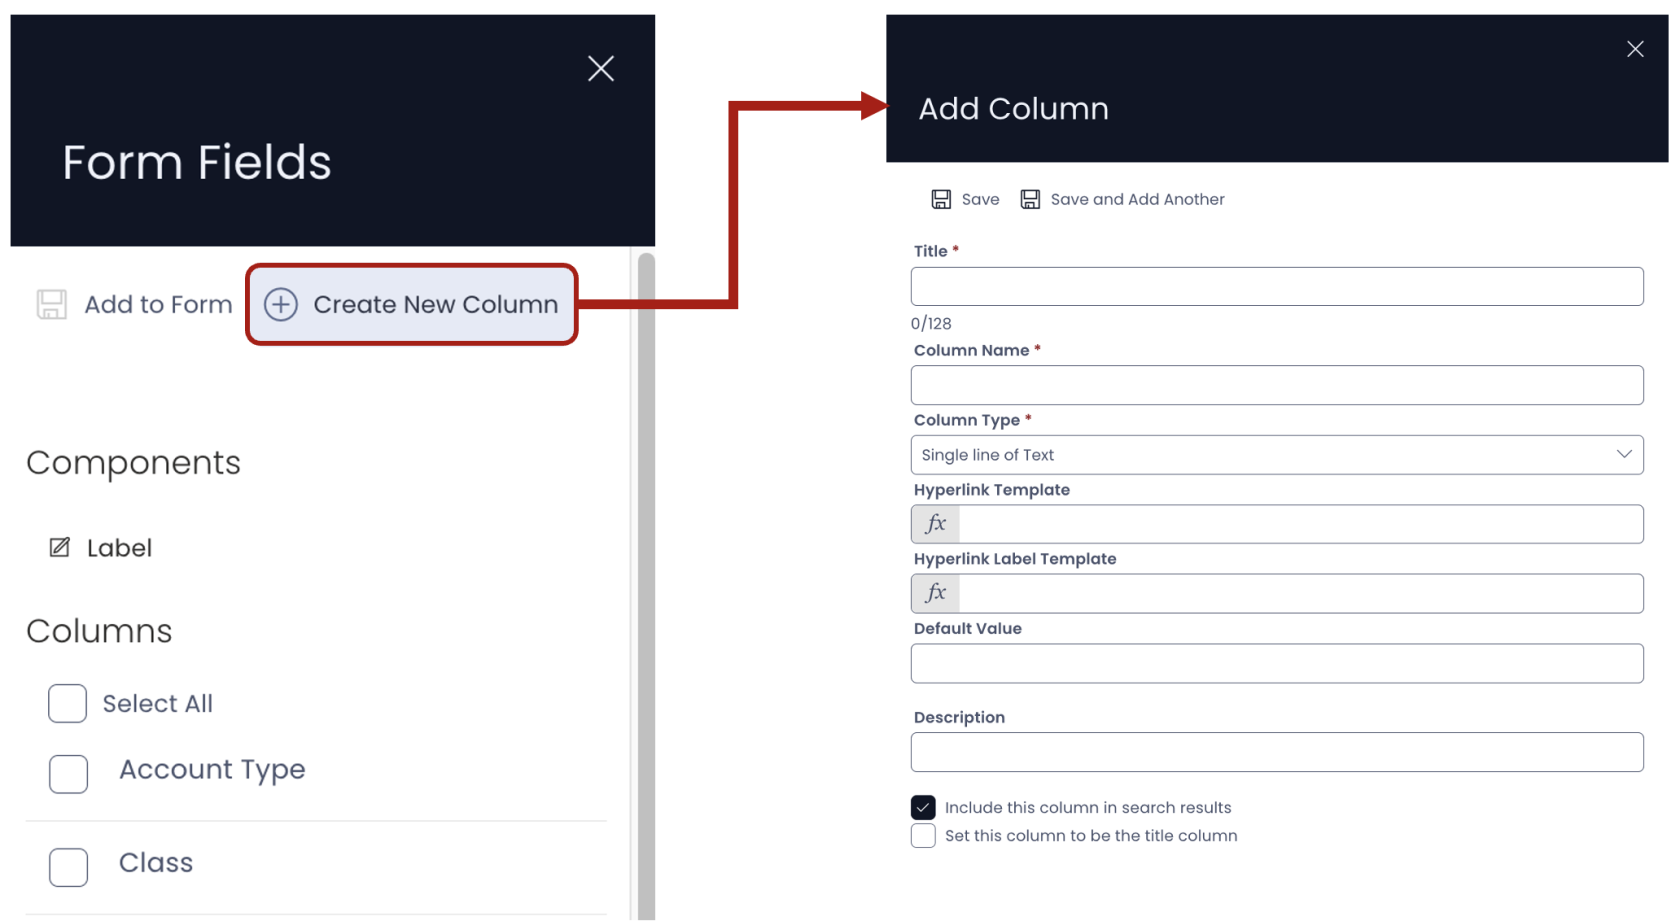
You can create new columns. By clicking this button from within the Form Fields panel you can navigate to Add Columns panel for the Data Table.
-
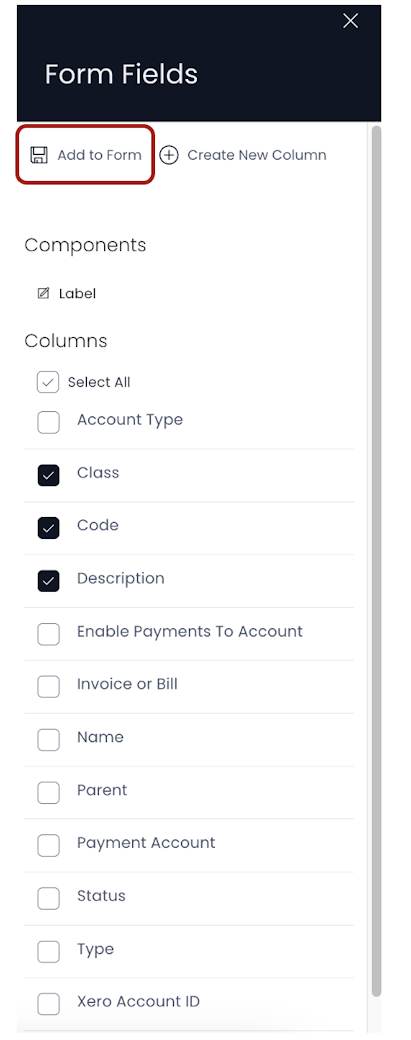
You need to click "Add to Form" button to add selected fields to the Form.
-
-
-
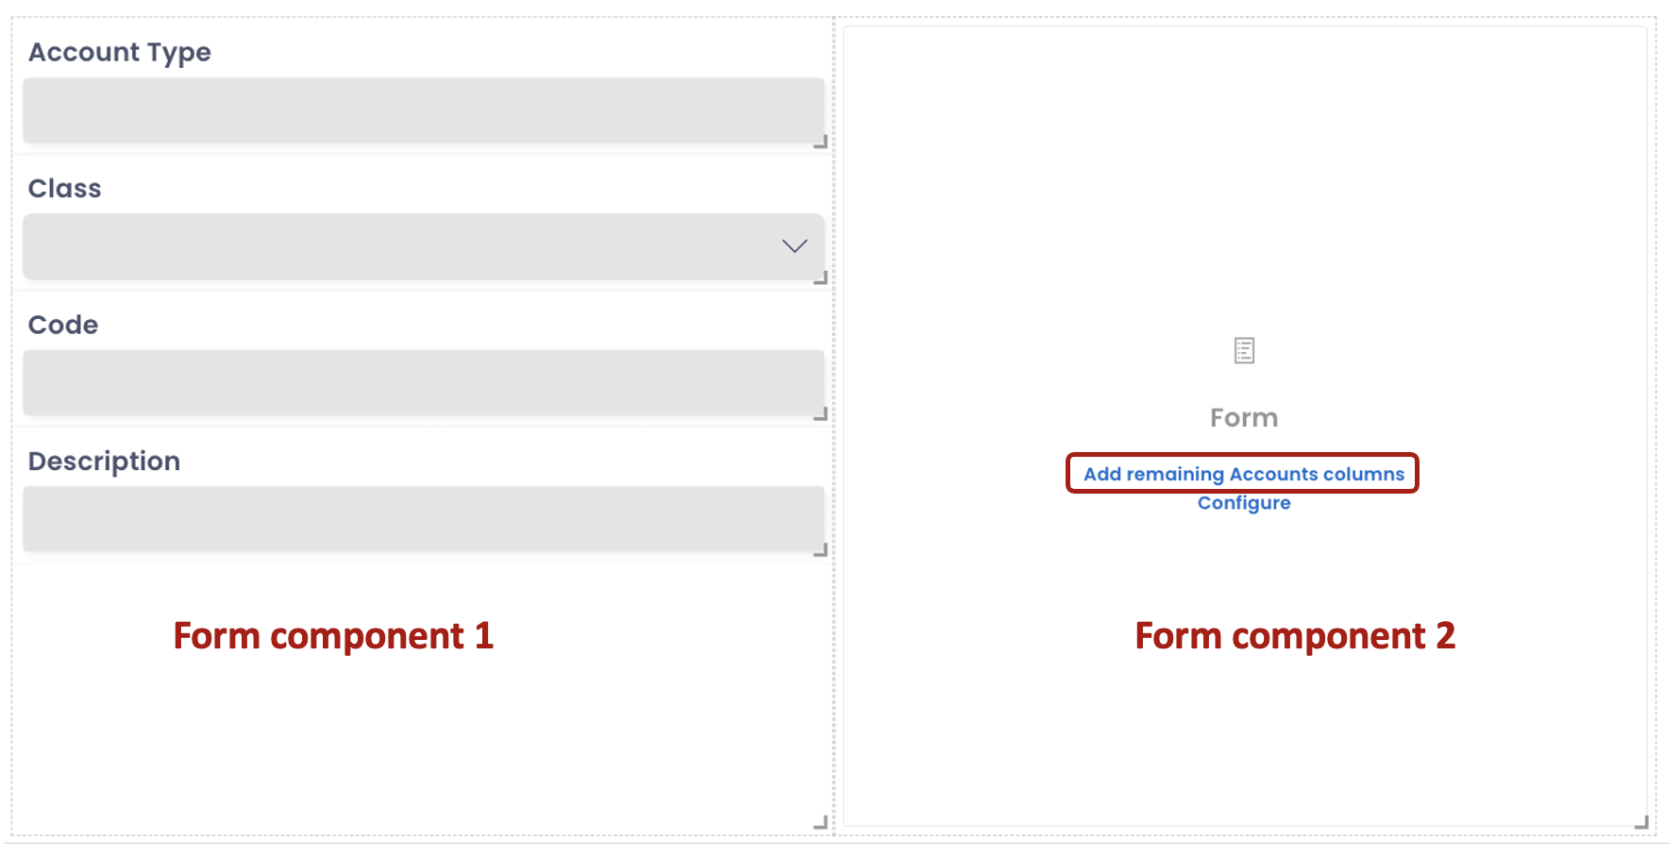
There can be occasions when you want to have two Form components to the same Layout / Page. In such a case, if you have added a few fields to the first Form Component, the system will give you option to add all the remaining (non-system built-in columns) to be added to the second Form Component.
Important points
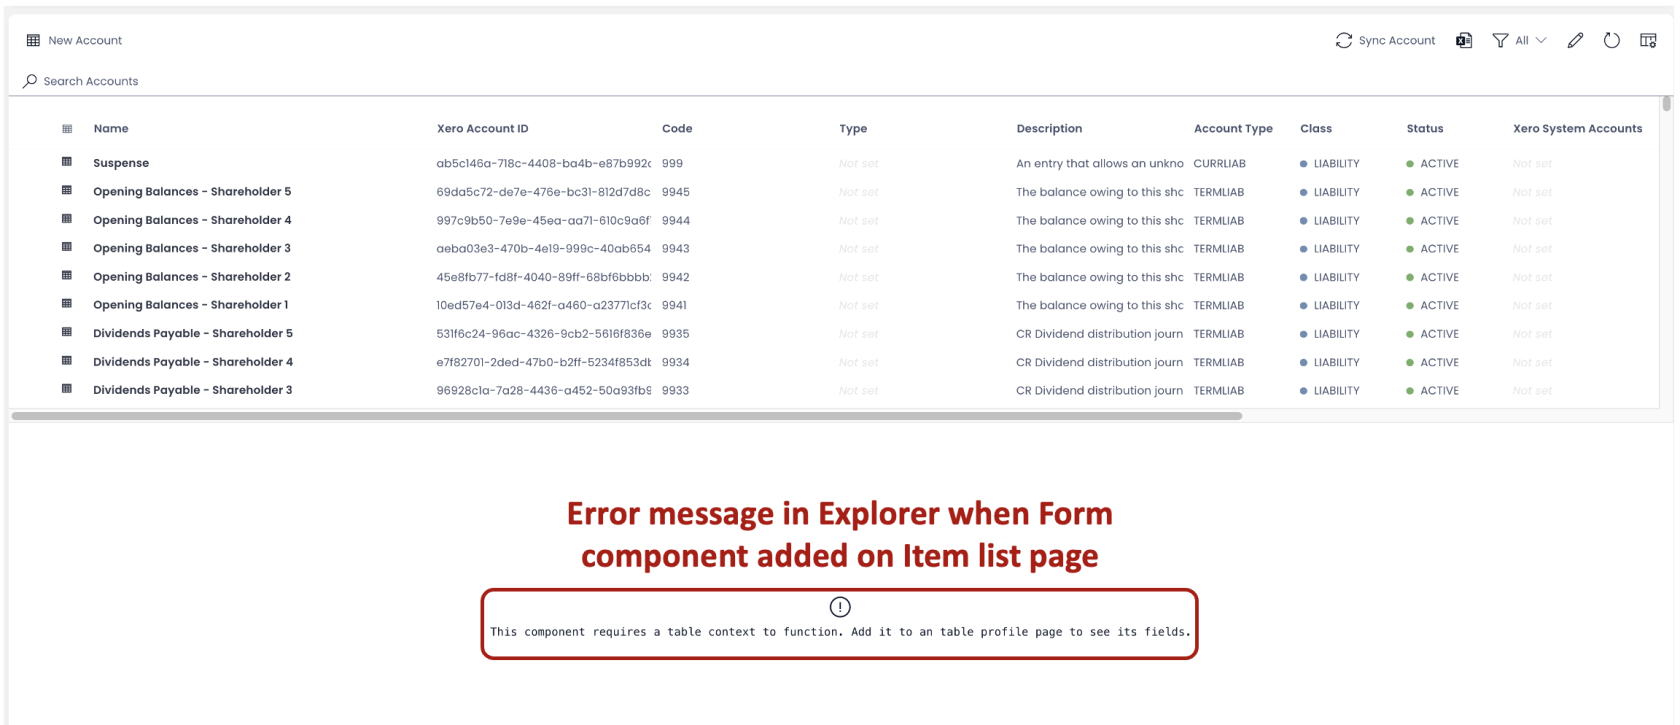
- The Form component is meaningful only on the Individual Item Level (singular). Although, you can add a Form component to the Item Group List level (Plural), but it gives a logical error message.
-
The Form component will refer to the subject Table only (on whose Design Tab you are adding the Form component).
-
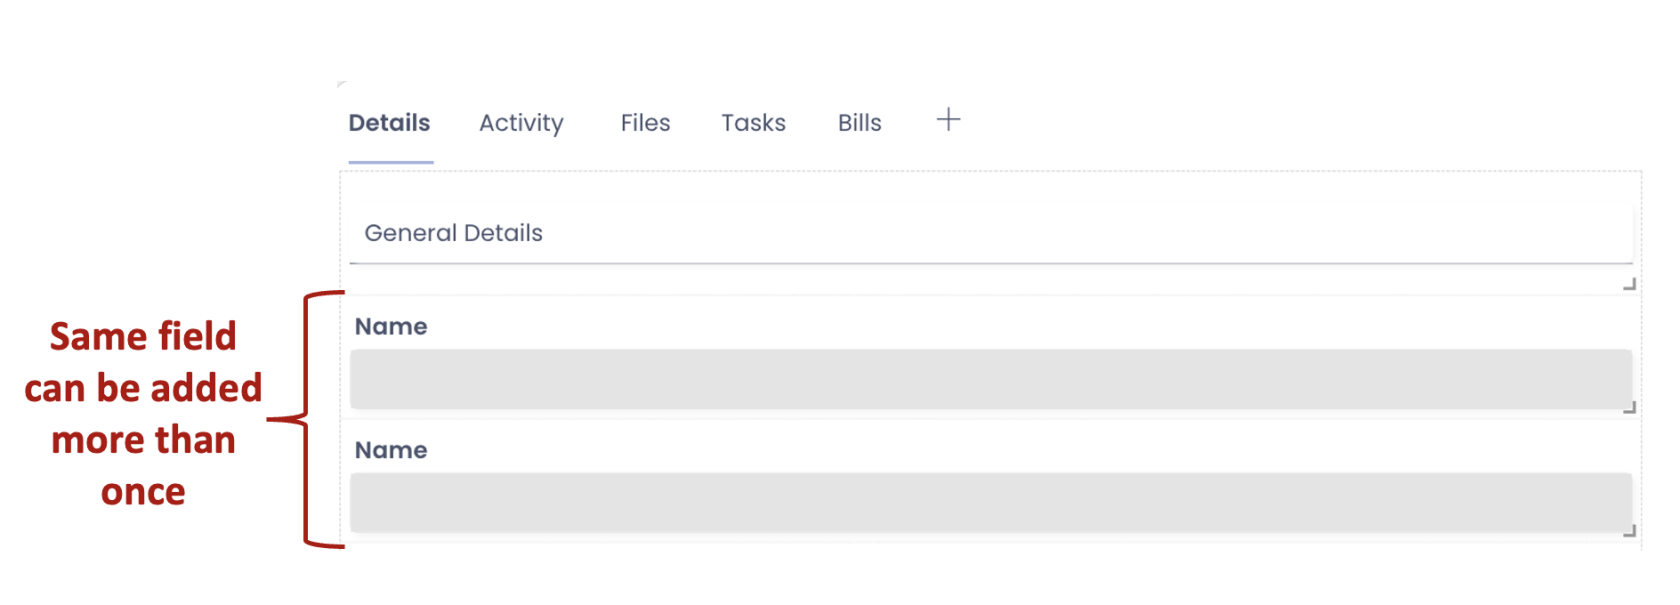
You can add the same field more than once on a Form.
- You can remove a field from the Form component by clicking on the "X" icon.

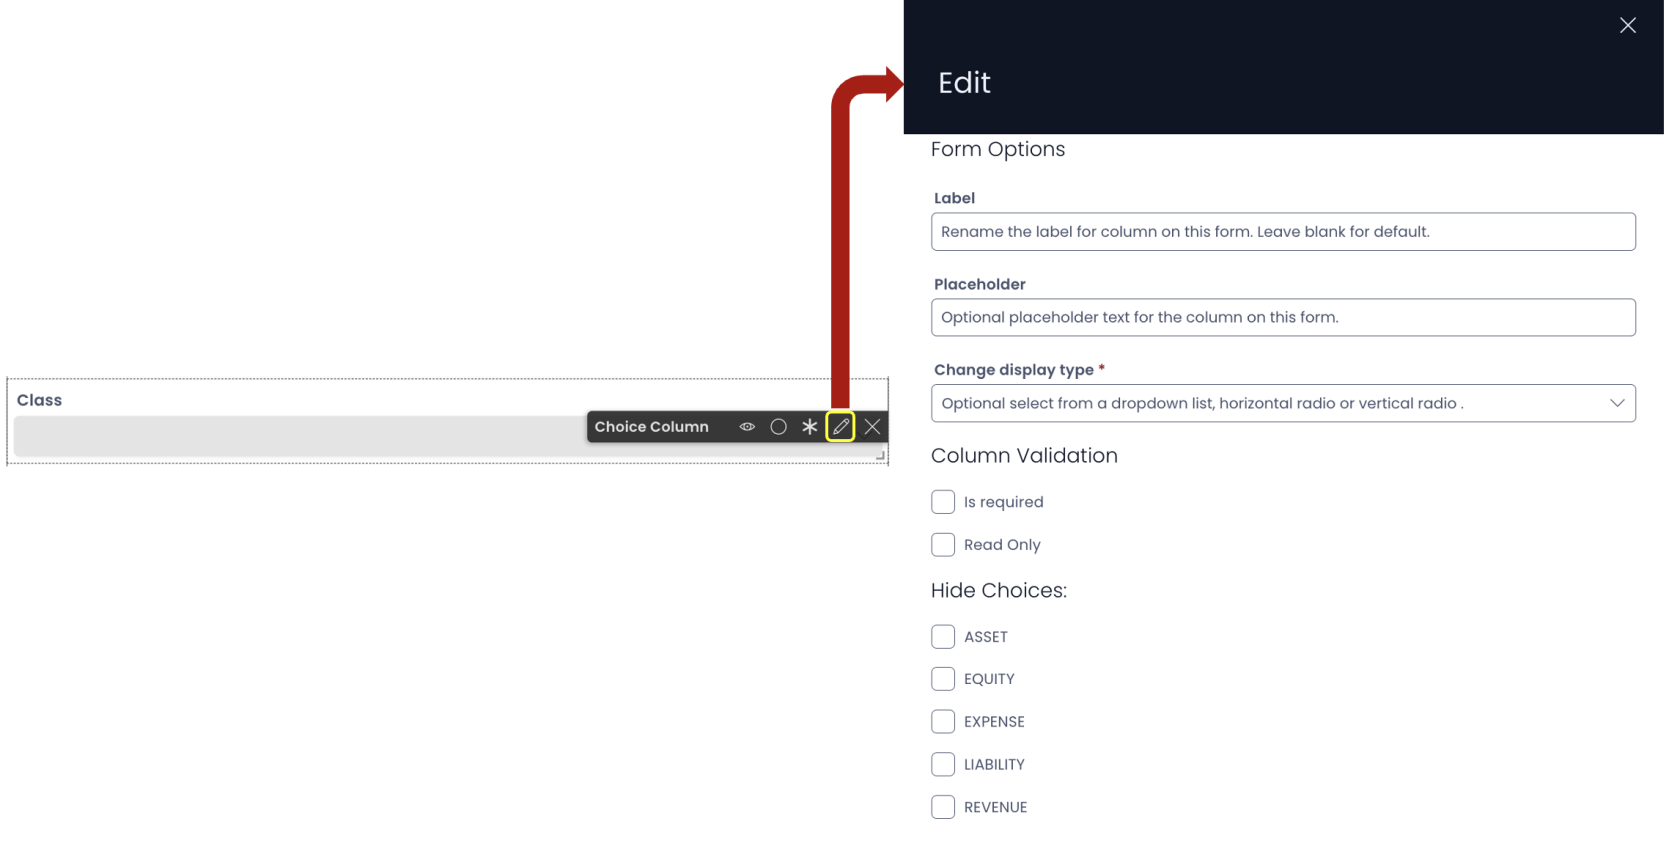
- You can edit properties of a field in the Form by clicking on the Edit (pencil) icon. This will open the Edit Preferences panel for the field and based on the type of the field, it will provide you display options.
